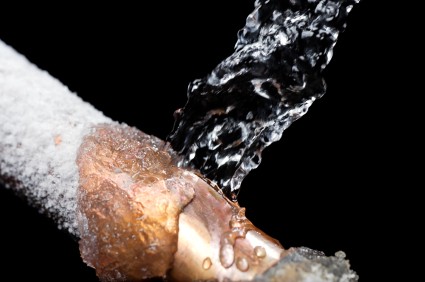
Burst pipes are expensive, destructive, and…preventable.
Most people know that they need to winterize the plumbing in a camp or vacation home to keep it from freezing over the winter and bursting the pipes. But you also need to winterize the plumbing in your primary residence, even if you’re going to stay there all winter.
This is really one of those situations where an ounce of prevention is worth a pound of cure – and the prevention is easy.
The right pro-active maintenance will keep your home’s pipes warm and cozy all winter, so that you and your possessions stay comfortable and DRY!
Here’s how you do it:
1. Insulate exposed pipes
Check to see if you have exposed piping in un-insulated spaces such as a crawlspace, attic, outside walls, etc.
If you have exposed piping, you should insulate the pipes. The materials are inexpensive and the task doesn’t require a high level of DIY skill. However, it does require patience and care to ensure that pipes are completely covered.
There are a number of different options for insulating pipes. You can wrap regular fiberglass attic insulation around pipes, but an easier alternative is the foam or fiberglass tubing (also called “tubular sleeve insulation”) that is made specifically for pipes. You should look for insulation with an R-4 rating (most standard 5/8 foam tubes have this rating).
Whatever insulation you use, make sure you begin by removing any dirt or grease from the pipes with a rag and mild cleanser. Allow the pipes to dry thoroughly before wrapping them with insulation. Make sure you cover the pipe completely, taking extra care at corners wherever two sleeves or pieces of insulation meet. Wrap these areas with duct tape to seal them completely.
(Always use duct tape to secure the insulation to your pipes. Other forms of tape, like masking or electrical, will stretch or break over time. You’ll lose the integrity of your seal, and eventually you’ll have to tape the pipes all over again.)
If you have pipes that have frozen in past winters, or pipes in spaces that will fall below zero, you may wish to consider using heating tape. It is a plastic strip with heating elements embedded in it that can be wrapped around pipes and plugged in. Heating tape is easy to install and can be purchased in most hardware stores. While it is effective, it can be expensive to operate and so should only be used when regular insulation is not enough.
Note: When you’re looking for exposed pipes to insulate, focus on pipes where the water comes in, not pipes where the water drains. Drain pipes – except for the traps beneath sinks, tubs, and showers – generally do not hold enough water to cause damage if frozen.
2. Caulk outside pipes
Caulk around pipes where they enter your house from the outside. There are lots of different types of caulk, so check with your plumber or local hardware store to find out which type will be best for your home.
3. Shut off and drain exterior faucets (or insulate them)
First, go down to your basement and locate the shut-off valve for each exterior faucet. Turn the valve so that the water supply is shut off. Then, go outside and turn the faucet on, so that any remaining water drains out of the faucet. (You can leave the faucet in the on position all winter.)
Not all faucets have a separate shut-off valve in the basement. Check with your plumber if you’re unsure.
If you can’t shut off and drain your exterior faucets, you should insulate them. The easiest, most attractive, and most effective way to insulate them is with molded foam insulating covers. These are available at most hardware stores.
And…don’t forget to drain your hoses and bring them inside for the winter! You should also drain and shut down your sprinkler system (follow the manufacturer’s instructions).


